SW-Aerospace-Smart-Repair-Video-Series-SKYscapes-3-Stage-Mica-850-Series-English-video-en_US.mp4
GFX: Sherwin-Williams Aerospace Coatings
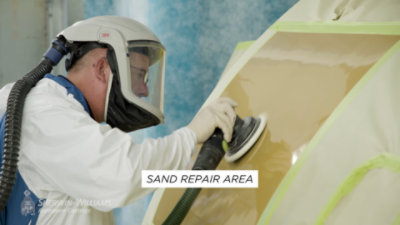
[00:00:11] Hi, guys. My name is Richard Giles, Sherwin-Williams Aerospace Technical Service and training manager. I'm here at our training facility in Andover, Kansas. In this video clip today, we're going to be talking about the three stage mica system. We start with the ground coat, of course, which was covered in a previous video clip. For repair we have a translucent mica mid coat which goes on top of the solid color, of course, for your effect. And of course, the whole thing has to be clear coated with any of our clear coats from the CC1 CC3 the 850 line, and Acry Glow line. So this is it can be universally clear coat, the ground coating and mica, often the same hardener, same thinner package, activated thinner. They're both mixed at four to one to three. So there's a lot of commons here. This is a four stage process for spot repair. We start off with the ground itself. Then we work into the mica, which is going to be a combination of the ground and mica similar to the shimmer coat. And then we've got the option of using a wet bed surrounding a perimeter. And what the wet bed offers on particular colors like silvers and golds is that the mica lays down in a way that it can stand up and give you the frosting around the perimeter of repair.
This is a true base coat system, providing we do a repair in paint process, which is behind me, which is a very dark blue traditional repair, which is sanding, cleaning. We're using the 1100158 cleaner prepaint wipe and wipe on wipe off technique. And then we're gonna go from solid color transition mica into a wet bed. And then we can see with a sun gun that we've got that density and transition, invisible transition. So we're gonna mix this material, again, 4 stage. Very easy, a five minute flash between layers and you'll see how easy this repair can be. The wet bed in this case is our conventional clear. It's over reduced because we want to reduce solids by 50 percent, actually. And the reason for the wet bed is just to get the mica on the edges laying down into a uniform effect. Certain colors don't need the wet bed. We prefer that it's a one size fits all type of repair. And it just ensures that you're not getting a flop difference on an angle to the face on the repair. Again, very simple. It is a two gun technique. You can use full size guns, small spot guns, whatever, whatever is available, whatever you're comfortable with.
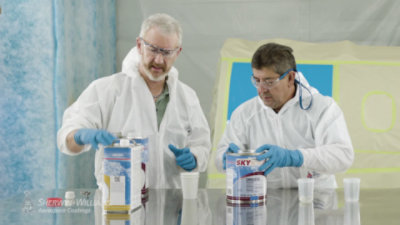
GFX: Color should be shaken properly
*Assistant mixing materials*
The two products here, which is the ground, which obviously is the opaque side of business that's mixed 4 base 1 harder 3 parts of activated solvent. In this case we're using it's called 850BR3, which is typical to solid colors. The mica, which is the translucency side and the effect side of business, that's mixed at 4:1:3, in this case because of the different solvent composition for orientation, we're using a product called 850BR1. It's the same ratio 4:1:3. Obviously, BR1 and BR3 here, they're both compatible with blending between one and the other today. So they are compatible. It's just a different composition.
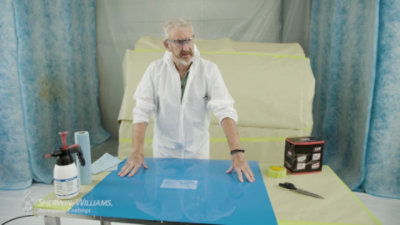
GFX: Mix Mica, 1 part hardener 3 parts reducer
Traditionally, we put the hardener in the base and then the solvent, the activated solvent into the chemical mix. And these are all volumetric ratios providing you mix accurately 4:1:3. In this case, we know that everything's going to be fine, chemically drawing wise, performance wise, color wise. So if you get this right, then everything is good.
*Assistant mixing materials*
The mica, the blending of the mica and the solid color is an 80 20 ratio. She got 80 percent of the mica itself, 20 percent of the solid color pigmented system. To give you a density transition between a solid color and the effect which we will do in the fourth component. What I typically do, we just line them up left to right, in this case, you've got the full base, you've got the transition, you've got the mica and then you've got the interface, wet bed. So we'll run along. Left to right. Utilizing this around this area, but relatively easy. Again, you can use two guns to save time and obviously do any gun adjustments. One time. Basically for each product. So let's get started and get this repaired. First stage is the base coat itself. The job of the base coat is simply to get the opacity to back into the body of the repair. Once that is flashed for a few minutes, we use a transition coat. The transition coat comprises of the mica itself and the solid color, which is a 20/80 split. We use a wet bed of a refinished clear coat. In this case, 850 CC1. That's applied over the whole repair, extending right past the 2 coat repair. While this is still wet, the wet but is still wet. We apply the full strength mica over the full repair, but it has to be within the wet bed area and this will give you the orientation, the color, the density and the effect. Finally, we use a sun gun to make sure that you've got the opacity, you've got the effect, you've got the repairability that you're looking for.
GFX: Repair must be clearcoated
It's very user friendly. And this goes through all color ranges from silvers to golds. In this case to blue, now that all of the repairs are clear coated and you can see that the color transition profile under repair itself is totally invisible to the eye at all light conditions in all angles. The definition of a repair is where is it? If we can achieve an invisible aesthetic repair that isn't noticeable to the inspector or customer and all like conditions, we consider that successful. Follow us on our YouTube channel Sherwin-Williams Aerospace for all future smart repairs.
GFX: Sherwin-Williams Aerospace Coatings
Swaerospace.com